Fall is quickly approaching and I am eager to start decorating. But there’s only one problem. I’m seriously lacking inspiration. I think that’s the problem with having a deep desire to be crafty but also having kids. There are a lot of great ideas out there that would never survive being in my house.
I’ve always wanted to decorate our front porch area for the seasons and holidays but I didn’t really know where to start. But recently, I refurbished an old garden bench we had. Once I put it agains the front of our home, it started giving me serious fall vibes.
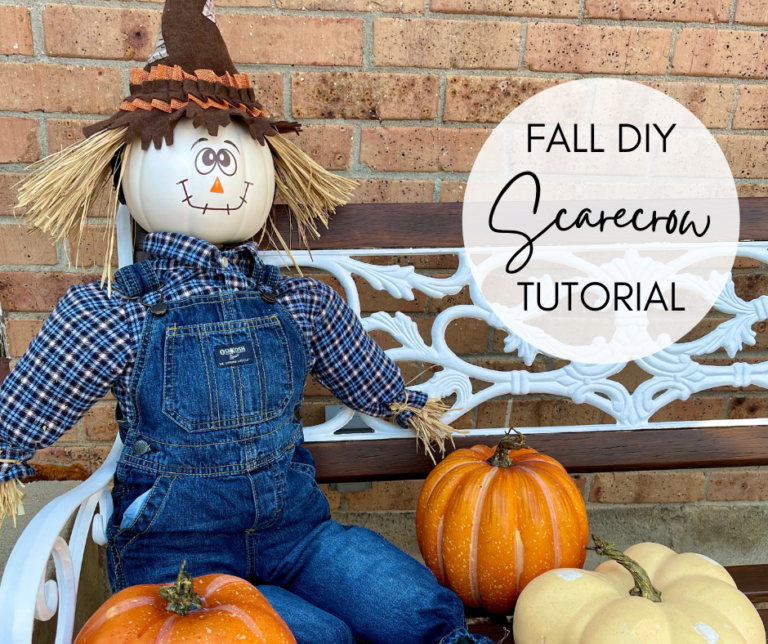
My sister, being the home decor expert, had given me the idea of putting a scarecrow out front. Since I had never made one before, I wanted to give it a shot. I am so thrilled with how it turned out! It was also a really quick and easy project. So, let’s help you make your own scarecrow!
1. Gather Supplies

- 6.5 inch white craft pumpkin (I got mine from Michaels)
- 36 inch wooden dowel (I used 7/16 inch and wouldn’t go any smaller than that)
- Raffia
- Straw bale
- Hat-baseball cap, straw cowboy hat, or whatever else you can find
- Old flannel shirt and overalls
- Permanent vinyl, paint, or sharpies for the face
2. Secure Leg and Arm Holes
Check local thrift stores for scarecrow clothes. I actually used some of my son’s old clothes when he was little. With four girls, I figured I wouldn’t be using his baby clothes anytime soon anyways!
To get started, you are first going to tuck the flannel shirt into the overalls. Using a small handful of raffia, fold the bundle in half a couple of times and cut the ends. Then, tuck the raffia into the pant legs and sleeves.
Secure the ends with a few pieces of raffia and double knot it on the back side of the scarecrow. Repeat with each leg hole and arm hole.
3. Cut Wooden Dowel and Tie Together
Eyeball where the wooden dowel might meet the crotch seam of the overalls. Be sure to leave a little length of wooden dowel to attach to the head.
Using the two dowel pieces, tie them together like a cross using another few pieces of raffia. The raffia keeps them tied together but still loose enough so you can adjust the horizontal dowel to fit into the arm sleeves.

4. Attach Pumpkin Head
Using scissors, carefully stab a hole into the bottom of the pumpkin. This will be where the head slides on so don’t make the hole too big. Attach the head and secure with hot glue if needed.
5. Bring Scarecrow to Life
Now insert the wooden dowel into the flannel shirt and overalls. Adjust as needed and start packing straw into the legs, working your way up to the arms. I left the flannel shirt unbuttoned a little to make it easier for my hand to get all the way to the bottom of the pants. Don’t forget to button him back up when you are done.
6. Add Finishing Touches
Finally, give your scarecrow some personality! I found my scarecrow hat in the costume section of Walmart. Because the hat has a headband attached, I decided to add some hair to hide it. Using hot glue, put a vertical line of hot glue along the top of the pumpkin and attach a handful of raffia. It doesn’t have to be perfect! As you can see, my scarecrow got the Covid special for his haircut. I also hot glued the headband to the pumpkin to keep it from falling off.
For the face, I used my Cricut machine to cut permanent vinyl. You can also use paint or permanent markers.
Welcome Fall
This was such a fun, fall DIY project! Now, bring on the pumpkin spice lattes!
Please be sure to tag me on social media so I can see your scarecrow! Happy Fall Y’all!


1 Comment
What a cute and fun seasonal craft!! I love how your scarecrow turned out! Thanks for sharing!